

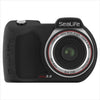
Choosing a Sealife Camera for Clearer Dives and Better Pics
, by Admin, 4 min reading time
, by Admin, 4 min reading time
Choose a Sealife Camera for dependable underwater photos and video, with practical advice on depth, lighting, controls and travel-ready dive setups today.
A Sealife Camera is built for the moment a fish turns side-on, a mate drops below the reef ledge, or the light cuts through clear blue water. Unlike a general-purpose camera pushed into an aftermarket housing, these systems are designed around underwater use from the outset. That matters when gloves, current and limited bottom time leave little room for fiddly controls.
For recreational divers, the right setup is usually the one you can operate confidently while maintaining buoyancy and awareness. High-end specifications are useful, but only when they suit the type of diving you actually do.
Start with the depth rating. Choose a camera and housing rated beyond the depths you normally plan to reach, with a sensible margin for deeper sites or future training. This is not a licence to exceed your certification or dive plan, but it gives the equipment a better fit for regular local use.
Controls deserve equal attention. Large, clearly marked buttons are far easier to use with wet hands or gloves than a touchscreen-dependent setup. A simple mode switch, reliable shutter button and clear screen can make the difference between recording the encounter and missing it while changing settings.
Image quality is only one part of the decision. Resolution helps if you intend to crop images or produce larger prints, while good video stabilisation is valuable for handheld clips in surge or while finning slowly over a reef. For many divers, a compact camera that is easy to carry, rinse and use often will produce better results than a more complex rig that stays at home.
Battery life and storage capacity should be considered as a pair. Cold water, video recording and screen use can drain a battery faster than expected. Carrying a charged spare battery and an empty, compatible memory card is practical insurance for a full day on the boat or shore.
Water absorbs colour quickly. Reds begin to fade in relatively shallow water, and deeper scenes can look blue or green even when visibility is excellent. A camera can correct some colour automatically, but it cannot replace light that never reaches the subject.
For close-up fish, reef details, nudibranchs and wreck features, a dedicated underwater light or flash can restore colour, contrast and definition. The trade-off is extra gear to position, charge and manage. A compact camera on its own is often ideal for travel and casual dives; adding lighting becomes worthwhile when photography is a regular part of your diving.
Positioning matters as much as power. Keep the light slightly off to the side rather than pointing it straight at the subject from beside the lens. This reduces backscatter, the bright specks caused when light reflects from suspended particles. In lower visibility conditions, getting closer is generally more effective than turning up the light output.
A straightforward compact SeALIFE camera suits divers who want quality holiday images, buddy shots and easy video without building a large system. It is also a sensible choice for newer underwater photographers who need to keep their attention on safe diving habits.
Divers with a strong interest in macro subjects or wide reef scenes may benefit from expandable options such as trays, handles and external lights. These accessories improve control and results, but they add bulk and require practice. If you mostly shore dive, consider how comfortably the system travels from the car park to the water. If you fly regularly, check the packed size, weight and battery transport requirements before committing.
Conditions should guide expectations too. Clear tropical water rewards wide shots and available light. Temperate sites, kelp forests and lower-visibility wreck dives often favour close subjects and deliberate lighting. No camera removes the need to work within the conditions, manage buoyancy and avoid damaging marine life for a photo.
A pre-dive camera check prevents most avoidable problems. Inspect the O-ring sealing surface for sand, hair or lint, and use only the manufacturer-approved lubricant where required. Check the housing is properly closed, the battery is charged, and the memory card has enough free space. If your system has a vacuum seal check, use it according to the instructions before heading out.
Once underwater, take a few test shots early in the dive. Confirm the lens is clear, exposure looks sensible and the controls respond as expected. Keep the camera secured with an appropriate lanyard or clip, but never let it become an entanglement risk.
The best underwater images come from calm, close and respectful observation. Choose a Sealife Camera a setup that you can operate without distraction, then give yourself time to learn it on familiar dives before chasing the once-in-a-lifetime shot.

Price Match Promise
If you find the same item in stock cheaper we will match it

Fast Delivery
Most Deliveries will arrive in 3 -6 working days

Need Support?
You can call us wih questions
021449903

Easy Returns
See our return policy


